![]()
Intelligence Agents
Brightspace has introduced a new tool to assist instructors: The intelligence agent. It allows you to create an “agent” that triggers when certain activity or criteria are met. These can include:
- Tracking Brightspace logins
- Checking completions on assignments, discussions, quizzes, etc.
- Emailing users if their grade is below a certain level
Creating an Agent


- Go to Course Admin through the Navbar
- Find and click on “Intelligence Agents”
- Click on “New Agent”
Naming and Activating Agent

- Give your agent a DESCRIPTIVE name and add a brief description (optional). You’ll want to be clear with what the agent does so you don’t mistakenly use it.
- Place the agent in a category if you desire
- Checkmark “Agent is enabled” so the agent triggers when criteria are met
Scheduling


- Scheduling lets you choose what frequency you want the agent to run at. Each time interval has different settings, including one-time runs, so use what you deem necessary.
Criteria


- Select the roles you want this agent to apply to.
- For example, you would click “Users with specific roles” and select Learner if you wanted the agent to only ping students and not a Teaching Assistant or an Observer.
- Login Activity is whether they log into Brightspace at all.
- Course Activity is whether they have logged into the course itself.
- You can add whatever Release Conditions you want by clicking on “Create” or “Browse.” There are many release conditions you can set so please take the time to learn which ones you want to use.
Actions
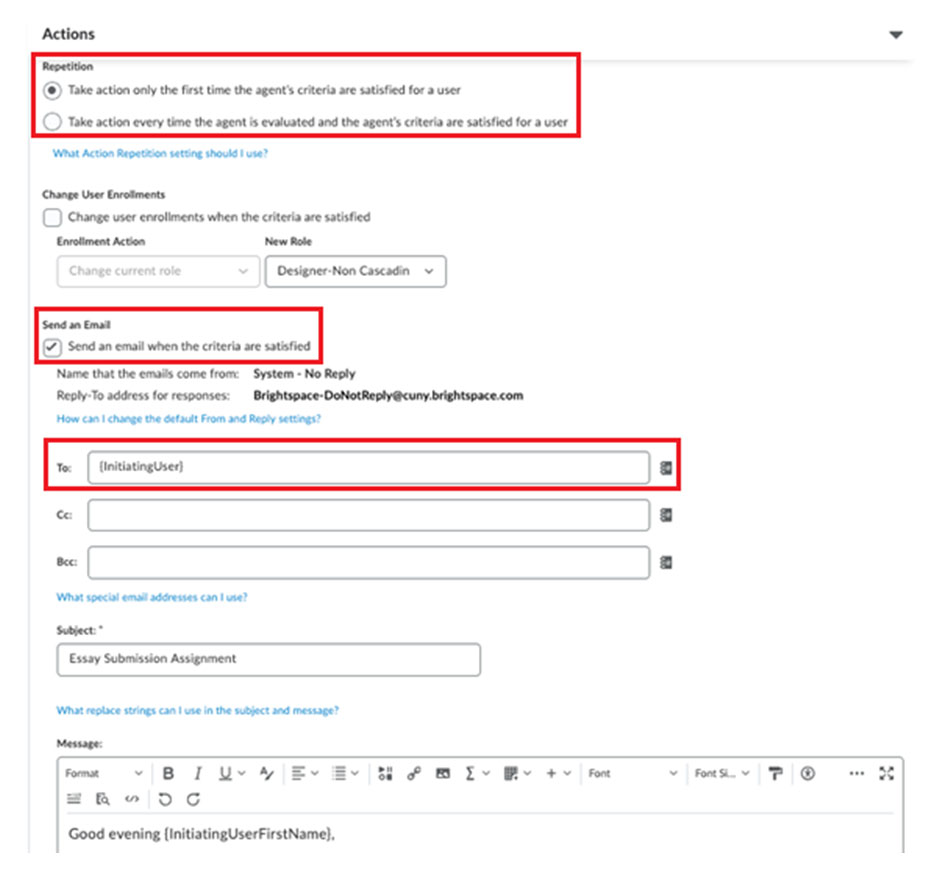
- Decide when the agent will take action. Click the blue text underneath for clarification about which one you should use.
- You can change the role of a user if they have met criteria.
- When you click on “Sent an email when the criteria are satisfied,” Brightspace will show you the options to draft the email.
- IMPORTANT: Add {InitiatingUser} in the “To” area so the agent emails the user that triggered it.
- Continue composing the email. Use the little address icon next to the sending fields to open the Address Book. Add a subject.
- Click “Save and Close” or “Save” when you are finished.
Additional Details

- This is what your Agent List will look like if it has agents in the course. Each agent will inform you of its last run, the users identified during it, and when the next run will happen.
- You can click the dropdown arrow next to an agent to give it a test run or a real run.
- Use the checkmarks next to the agents and the blue text above the list to edit, activate, disable, or delete agents in bulk.
Click the settings button on the upper right to change where the emails are sent from