LTI & Zoom
Adding a LTI to your Course
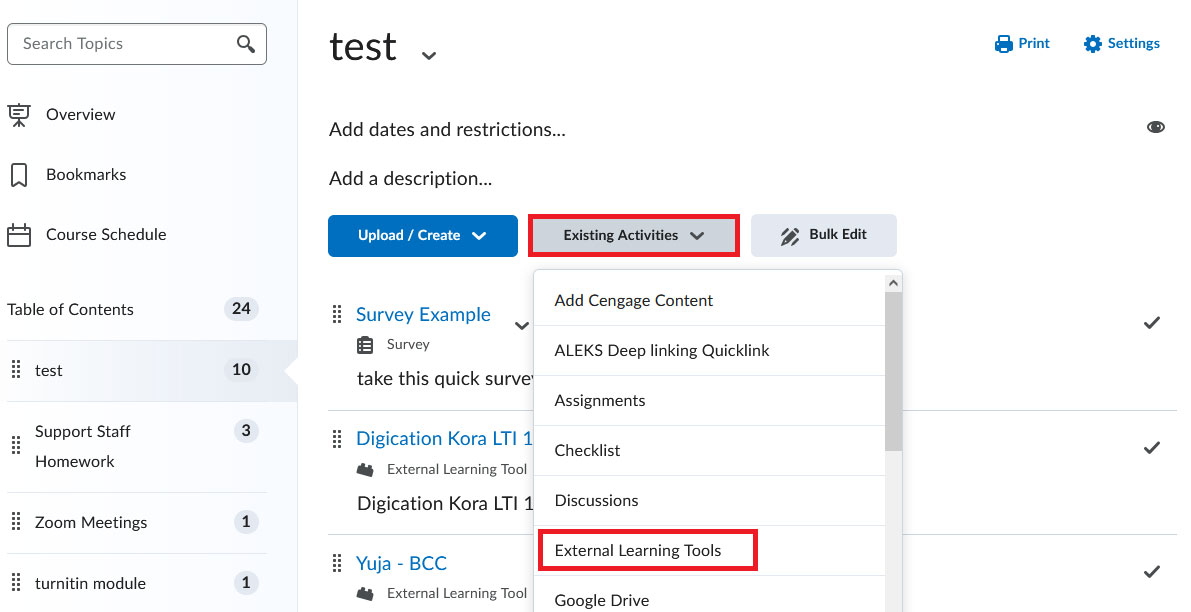
- Enter a content module area and select Existing Activities
- On the dropdown, select External Learning Tools (see below)
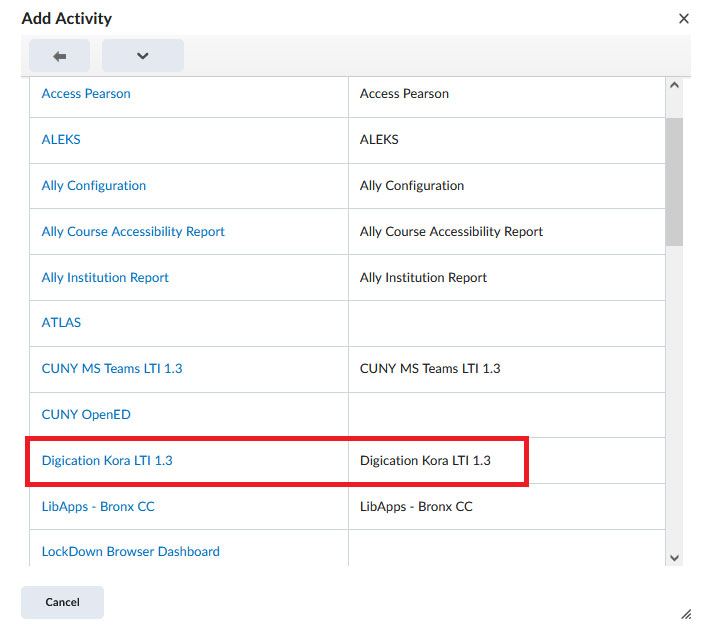
- Select the external tool you would like to add from the list (example below)
- The activity now appears within the module and is ready for use (below)
Adding Zoom to your Course
- Select the Content link from your course NavBar (below)
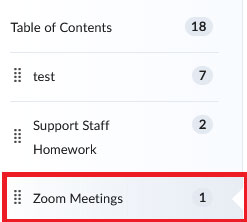
- Add a module for Zoom from the Table of Contents menu (below)
- Select the newly created content module and then select Existing Activities
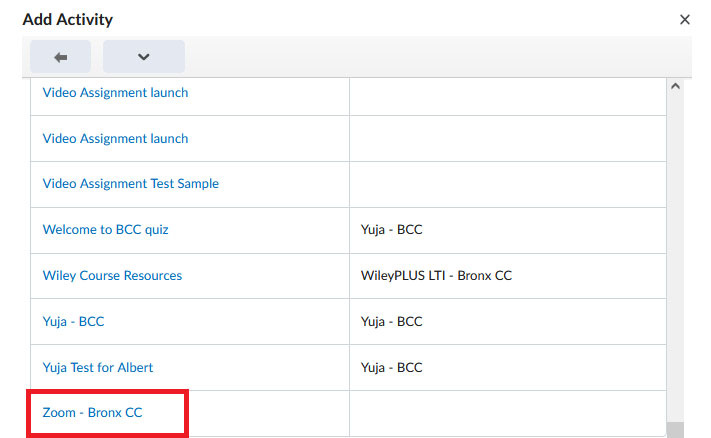
- Select External Learning Tools from the dropdown menu. Scroll to the bottom to find Zoom –Bronx CC. Then return to the new module with Zoom added (below)
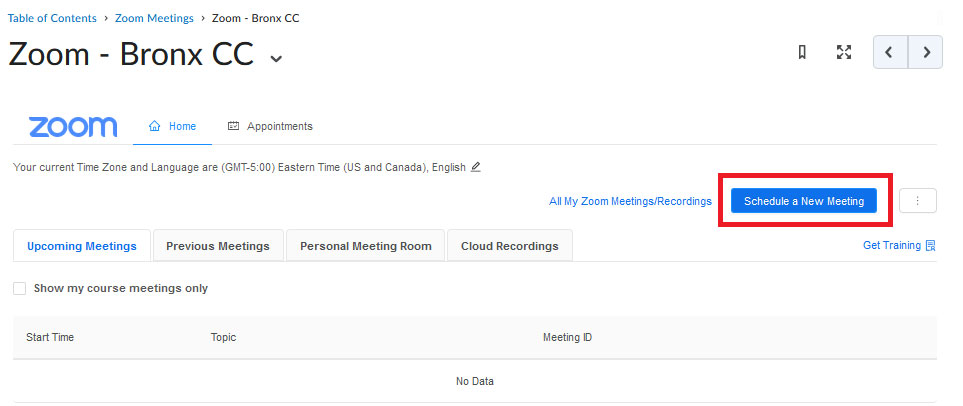
- Click on the Zoom tool link to schedule a meeting (below)
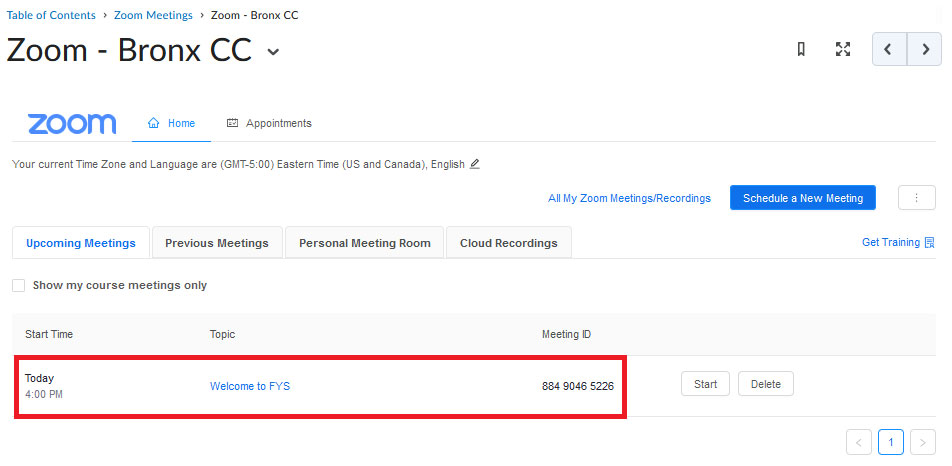
- Students will be able to click on the Zoom module, and the Zoom link to see their upcoming meetings. They will also be able to click on the meeting link to enter the Zoom meeting (below)
Creating & Using Checklists
A checklist contains important or required assignments, readings, or other items to complete. Checklist items must be organized into one or more Categories. For example, you might have an “Assignments” checklist with categories for written assignments and quizzes, both of which could have multiple items that must be completed. Alternately, you might use a checklist to organize steps of an assignment. You can assign due dates for checklist items.
To Create a Checklist
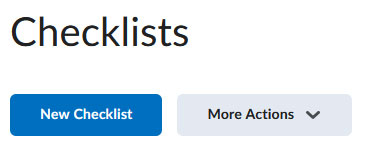
- Navigate to Checklists in the Course Admin tool and select New Checklist (below)
- Enter your Checklist details and select Save
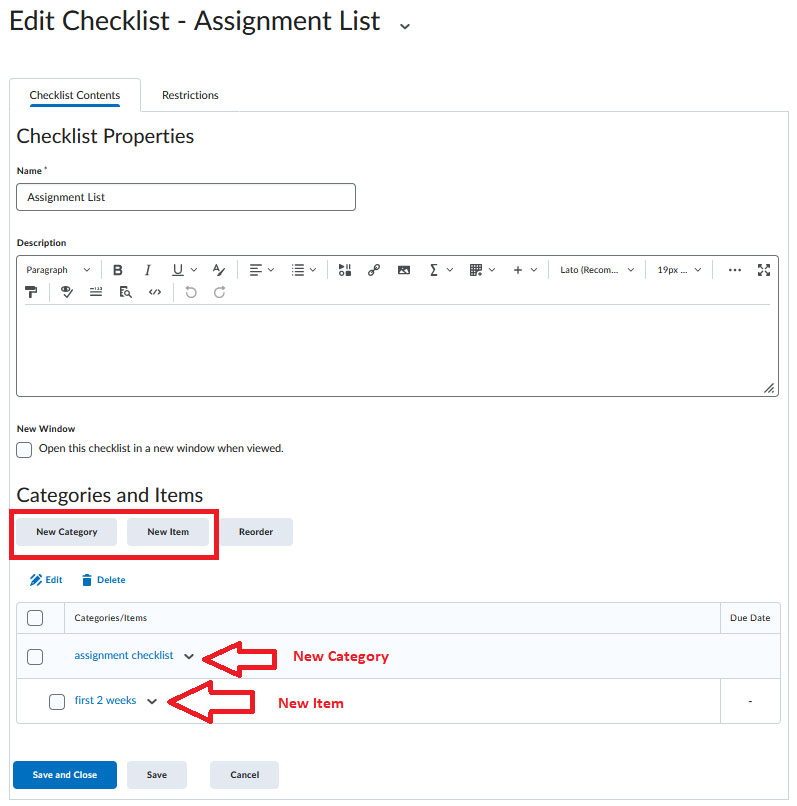
- On the Edit Checklist page (see below), in the Categories and Items area, do any of the following:
- To add a category to the checklist, click New Category. Enter your category details and click Save.
- To add an item to the checklist, click New Item. From the Category drop-down list, select the category for your item. Enter your item details. If you want the item to be due by a certain date or time, select the check box and enter your Due Date Click Save.
Note: The default due date for a checklist item is one month from the current date.
- Once you’ve added all your content to the checklist, select Save and Close (see above)
Copy a Checklist
- Navigate to Checklists
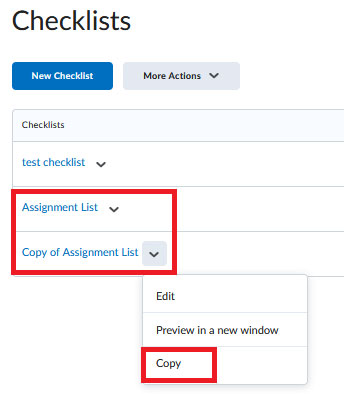
- Open the Actions menu for the Checklist you want to copy and click Copy (below)
- A new checklist is now visible at the bottom of the list of checklists with the title Copy of {original checklist name}
Set Release Conditions for a Checklist
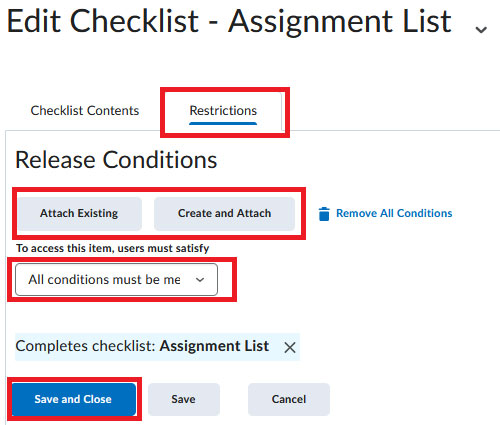
- Select your checklist and select the Restrictions tab (see image below)
- In the Restrictions tab, do any of the following:
- Select Attach Existing, then select the check box for any condition you want to attach. Select Attach.
- Select Create and Attach, then select a Condition Type from the drop-down list. Complete any additional Condition Details that appear and click Create
- To set how accessing the checklist is controlled, from the drop-down list, select if All conditions must be met or Any condition must be met.
- Select Save and close
Editing or Reordering a Checklist
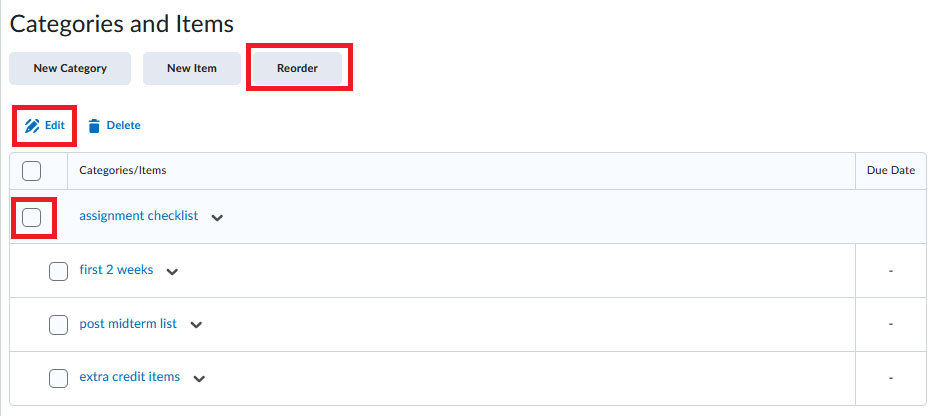
- To edit a Checklist, click on the downward chevron and select edit
- The Checklist table displays, with a list of Categories and Items (see below)
- Reorder Items within a Category by checking the box next to an Item and clicking the Reorder button
- To edit an Item, click on the Item name.
Adding a Checklist to a Content Module
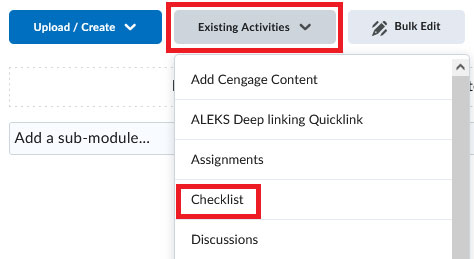
- To add a Checklist to a Module, click Existing Activities and select Checklists (see below)
- A list of existing Checklists Select a Checklist by clicking on it (see above)


