![]()
Sending Email
Go to the Classlist tool from the Navbar or from Course Admin (see above).

Check the students you want to email and click the “email” button on the top of the list. Or if you want to email the entire class list, click the “Email Classlist” button (shown above).

Add the contents of your email. Once you’re ready, click “Send” (see above).
Note: The students being messaged will appear in the “Bcc” area. Their emails will appear is firstname.lastname##@login.cuny.edu which means they will be sent to the student’s preferred email in CUNYFirst.
The Address Book search tool lets you add other people onto the email if you don’t want to type an email in the allotted boxes.
Note: Sending an email via classlist will not automatically send a copy to your own email. If you want to receive a copy of the email sent, add your own email to the message in the “To,” “Cc,” or “Bcc” areas.
Creating an Announcement

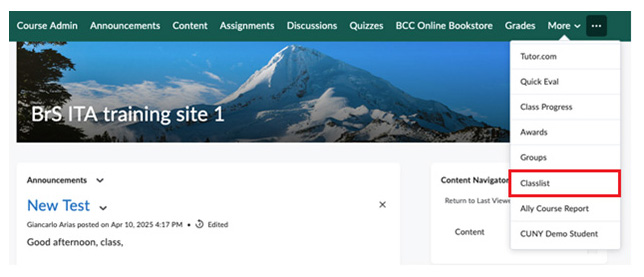
Go to “Announcements” in the Navbar or click the chevron/arrow next to the Announcement Widget on the homepage (shown above). Alternatively, you can go to “Course Admin” and find the tool there.

Click “New Announcement” on the widget or in the tool (see above).

Fill in the necessary fields (shown above and below).
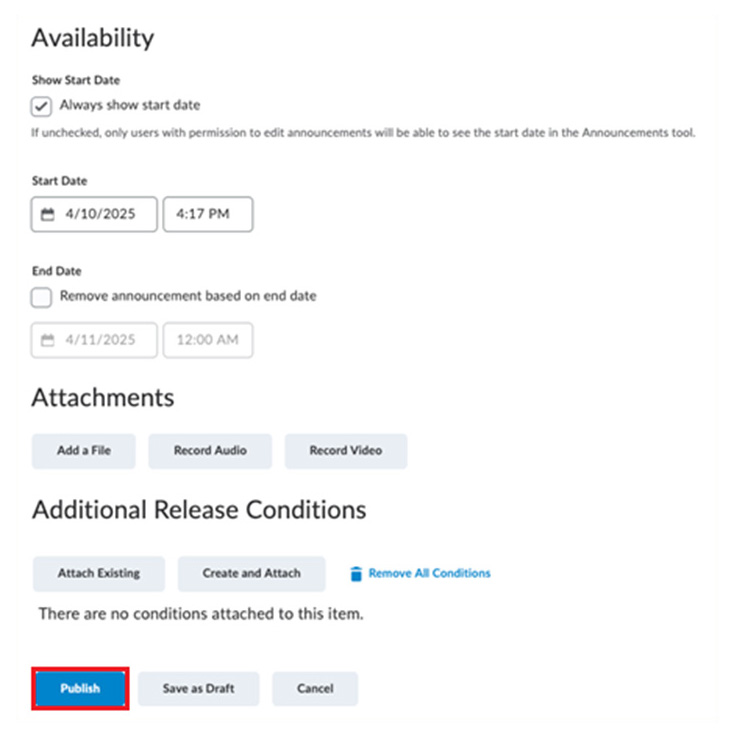
Modify whatever option you see fit. You can schedule announcements for the future, attach files or record yourself, even save the announcement as a draft so you can use it later. Click “Publish” when you are finished (above).
Details about the Announcement Tool
More details about the Announcement Tool are explained below.
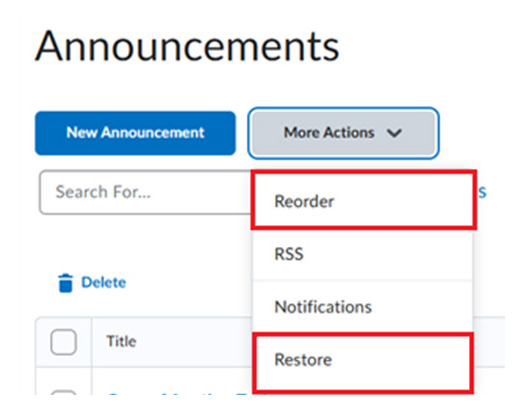
- “Reorder” – Change the order in which your announcements appear (above)
- “Restore” – Restore deleted announcements
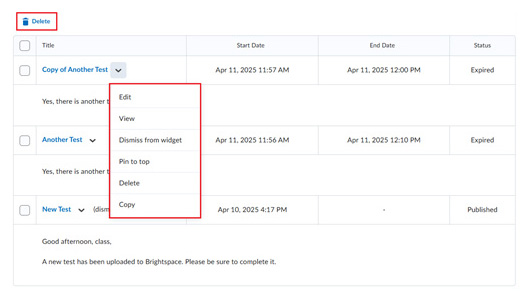
- “Edit” – change details and settings of announcement (above).
- “View” – Lets you view the announcement on its own page.
- “Dismiss from widget” – remove announcement from homepage widget.
- “Pin to top” – Keeps announcement on the top of the list; can pin multiple.
- “Delete” – Delete the announcement.
- “Copy” – Create a copy of the announcement.
- Use the “Delete” button on top of the list to delete announcements in bulk.
Note: There is no button to hide announcements from students, even in the Announcement tool. Dismissing it only removes it from the widget on the homepage. As an alternative, you can add an end date for the announcement and set it in the past.

- When the status says “Expired” (above) students cannot see the announcement anymore, allowing you to save announcements for future semesters without revealing information that should only be shown later in the course.