![]()
Adding Resource Links
There are three types of resource links you can add from Brightspace (see images below):
- Hyperlinks (Insert Stuff) to web content such as YouTube videos or websites
- Quicklinks to existing course content and activities, and external tools
- Images from your computer or course files
Add an “Insert stuff” item (variety of internal or external sources) using the icons from any toolbar in any place where there is a Text box: such as Assignments, Discussion, and Quizzes.


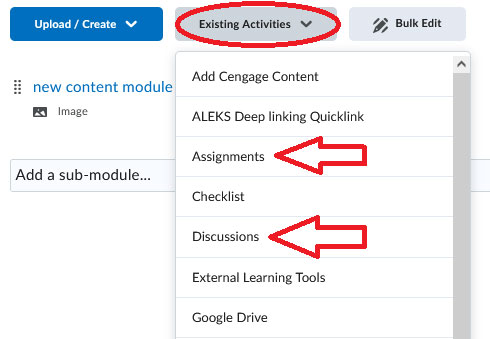
The Existing Activities button within the course Content area also allows you to add activities you have already created in a Brightspace such as Assignments, Discussions, and Quizzes within a content module:
Copying Course Materials in Brightspace
In Brightspace, you can copy course items such as quizzes, assignments and discussions to other courses or you can copy an entire course.
Copying Course Items
- Select Course Admin on the Nav Bar
- Select Import/Export/Copy Components (see below)

- You will then be asked what you would like to do with the following options (each option has an explanation below it; see image below):
- Copy components from another Org Unit (BCC course)
- Copy components from a parent template
- Export Brightspace Package
- Export a Common Cartridge
- Export as Thin Common Cartridge
- Import Components
- If you select course components from another Org Unit, you will be prompted to Select Course Offering. This is the course from which you want to copy. Note that it must be a course in which you are an instructor

- Once you select Search for offering, a pop-up window will display (below). Type the name or course code of the course you are copying: such as ENG 1200 or [course code] 12345. After you select Search, click on the circle button to the left of the course, and then click Add Selected

- You return to the main Brightspace page, with your selected course ready to be copied (see below). You can choose Copy All Components or Select Components… Select Components is recommended as it allows you to copy desired material without duplicates.

- If you choose select components, you will see a checklist of all of the components contained in your course (see below), including content, quizzes, and course files. Check off all of the components you wish to copy, and when you are ready, select Continue

- Confirm your selection by clicking Finish (shown below)

- Your content has been copied
Managing Visibility
Visibility of Course Items
You can determine the visibility of items in your course, such as grades, modules, and assignments by viewing the eye icon. However, visibility may also be affected by the dates or conditions you have set. For this reason, it is helpful to use the Manage Dates tool to check item visibility.
- Go to Course Admin on the Navbar
- Select Manage Dates (see below)

- Scroll to the bottom of the page to view the table of all of your course components and click on the chevron for the column named Visibility Status (below)

- To decrease the number of items in the table you can filter by tool and select the specific tool for which you would like to check visibility (below)

- View the last column to find your item of interest (see below). Items are:
-
- Visible if conditions met: a release condition has been applied to this item. When the condition is satisfied, the item will be visible
- Visible: the item can be seen by users within the date range you may have set. Refer to the Due Date, Start Date and End Date columns for more information
- Hidden: the item cannot be seen by users.

- Throughout Brightspace (such as the Content Area), you will see an eye with line through it if the item is hidden (see below).
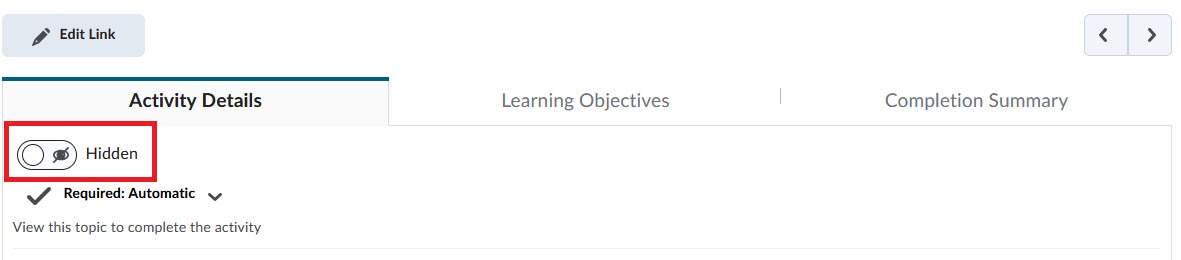
- If an item is hidden and you want to make it visible, open the tool (assignments, discussion, quizzes etc.) that the item is associated with, click on the chevron next to the item name and select from one of the options in the dropdown menu (see below)

Working with Course Content
Working with your Table of Contents
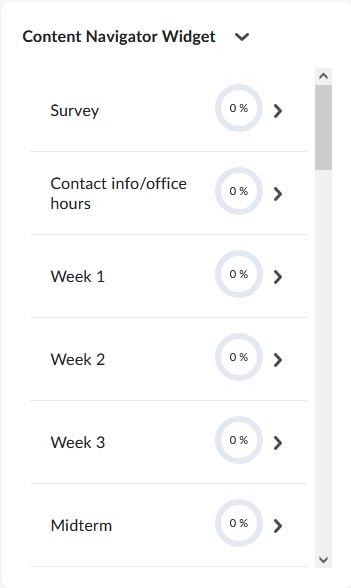
- On the right side of your course page, you will see a Content Navigator widget as a column. It is linked to the Content area modules of the course (shown below)
- If you click on one of the items, it will open a webpage to that module such as a Syllabus.
Adding a Module
In Brightspace, content is arranged in modules.
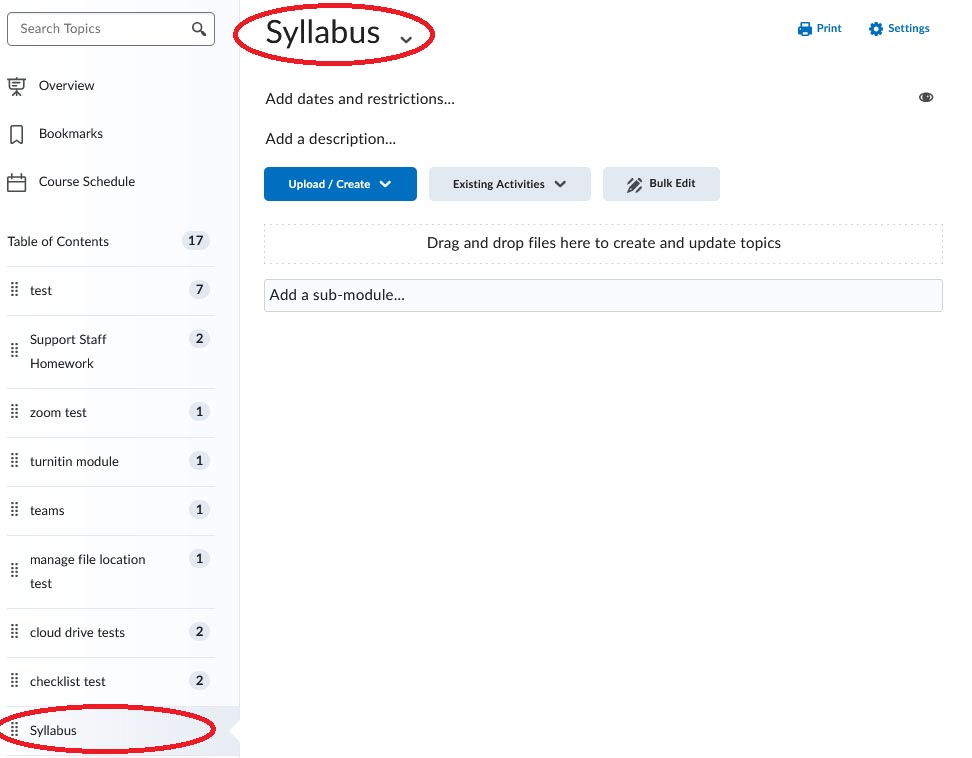
- To view your table of contents for the course select the Content link from the course navbar (shown below)

- Too add a module, go down to the add a module option under the Table of Contents side panel
- Type the name of the module and hit return. The name of the module will appear at the top of the module and on the table of contents. You will also see the new module under the Content Navigator Widget on the course homepage (see below)

Adding Content to a Module
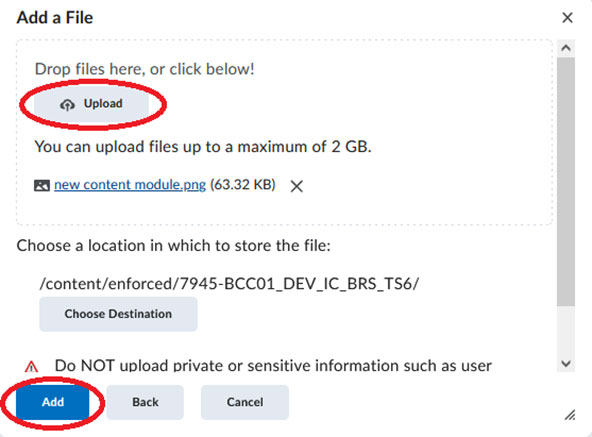
- Go to Upload/Create. Select the option Upload files. You will then be asked where the files are coming from. In this example, my computer is selected (below).


- You will then be prompted to upload your files. You can select Upload or drag and drop your file into the window. You can add multiple files at once. After the files have uploaded, click the Add button (below).
- You will then see your content added to the module (below)

Note: You can rearrange modules by placing your cursor on the series of 8 dots next to the name of the module. Drag the module to the place on the Table of Contents you would like it to appear. You should see a bar with a blue dot appear. When you see it, drop the module to the location.